-
Posts
261 -
Joined
-
Last visited
Never
Content Type
Profiles
Forums
Gallery
Blogs
Store
Articles
Events
Reviews
Products
Everything posted by MK0386
-
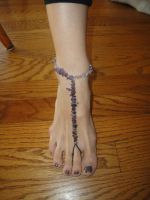
From the album: My DIY Beaded Barefoot Sandals Jewelry
-
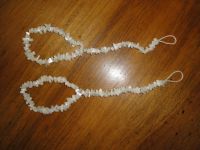
From the album: My DIY Beaded Barefoot Sandals Jewelry
-
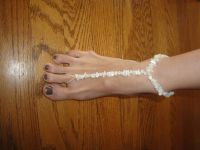
From the album: My DIY Beaded Barefoot Sandals Jewelry
-
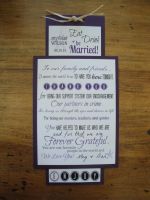
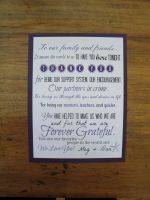
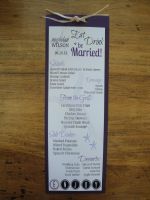
I created these menus and thank you notecards to be placed at each place setting at my reception. They were super easy to make and will help create a finished and put together look for the tables. Menu: All I did was create a design and insert my design into Word and then print on nice quality paper. I then taped the menu to purple card stock. Easy peasy! Oh- I also punched two holes at the top and tied a piece of rafia through to finish the look. Menu: For the tank you card- I definitely can't take credit for the wording although I did tweak it a little to better suit us. Thank you's similar to mine are all over Pinterest and Etsy but I knew I could make one myself for almost free! I designed the thank you note card just as I did the menu and printed it at home also taping it to purple card stock. Thank You Note Card: This is how they will be set up together at each place setting with the Thank You Note Card on top of the Menu: Happy Planning, ladies! Please let me know if you have any questions. -Megan
-

My DIY Reception Menu Cards with DIY Thank You Note Card
Images added to a gallery album owned by MK0386 in Pictures from (pre-2014) Forum Topics
-
From the album: My DIY Reception Menu Cards with DIY Thank You Note Card
-
From the album: My DIY Reception Menu Cards with DIY Thank You Note Card
-
From the album: My DIY Reception Menu Cards with DIY Thank You Note Card
-
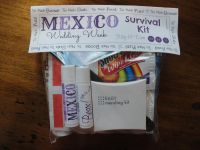
My OOT bags are almost complete, but I figured I'd go ahead and share the Survival Kit that will go in the OOT bag! This project was a lot of fun and thanks to the frugal brides OOT bag info thread... super cheap! That thread is here: http://www.bestdestinationwedding.com/t/80079/frugal-brides-found-a-new-website I bought my items at the Dollar Store, Wal-Mart, and minimus.com. Here is a list of what's in the Survival Kit: 1. DIY Personalized Chapstick - BulkApothecary.com - .14 cents/each (my DIY thread is here: http://www.bestdestinationwedding.com/t/84966/my-diy-chapstick-labels-for-oot-bag-with-pics-and-template) 2. Easy Mending Kit (thread, needle, safety pin) - Minimus.com- .27 cents/each 3. Shout Wipes - Minimus.com- .43 cents/each 4. Nail Polish Remover Pads - Minimus.com - .07 cents/each 5. Nail File - Dollar Store- bought a pack and it came to .03 cents/each 6. Cocoa Butter - Wal-Mart - .87 cents/each 7. Sunscreen - Wal-Mart - .97 cents/each 8. Wet Wipes - Dollar Store- .33 cents/each 9. Emergen-C - Minimus.com - .43 cents/each 10.Razors - Wal-Mart- .17 cents/each The bag has 2 or 3 of certain items so the total for each bag is only $5.04 and it's for 2 people b/c each couple will share one bag and that is why there are 2 of certain items like the chapstick, razors, etc. I prob could have gotten certain things cheaper but I had already purchased certain things when I found out about minimus.com. That site is seriously awesome! (The OOT bag will also have a few more fun items! This is just the Survival Kit that goes IN the OOT bag) Once I had my items, I was so excited to put a bag together and make a label for the top of the bag. I used zip lock baggies for the bag. I designed a label, and then just saved it as a .jpg and used Word to format 3 labels/page. I then printed them on my printer at home, and trimmed them to the right size with a paper cutter. Here is my design: Here is the bag all put together: Front: Back: Happy Planning, ladies!! Let me know if you have any questions -Megan
-
-

My DIY Survival Kit Label for OOT Bag with Pics and List of Items with Price Breakdown
Images added to a gallery album owned by MK0386 in Pictures from (pre-2014) Forum Topics
-
-
-
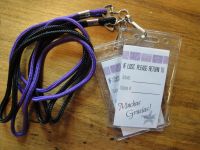
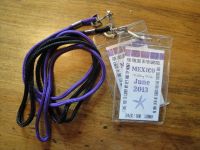
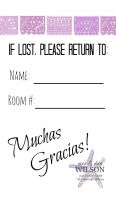
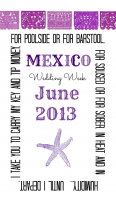
This was a very fun and simple project and I got a lot of inspiration from this forum, so thanks to all you BDW ladies!! I made a design and then just uploaded it to a Vistaprint Business card. I ordered ID Badge Holders from Specialist ID for only .28 cents/badge! http://www.specialistid.com/Standard_ID_Badge_Holder_Vertical_Vinyl_p/1820-1050.htm I also ordered my lanyards from the same website in my wedding colors for only .29 cents each! http://www.specialistid.com/Standard_Non_Breakaway_36_Neck_Lanyard_p/2135-300x.htm I also got a discount bc my order was considered a bulk order bc I used the same badges for my luggage tags. Check out my thread for those here: http://www.bestdestinationwedding.com/t/84974/my-diy-luggage-tags-with-pics#post_1872847 Once my materials arrived I just put them together.... SIMPLE! Here is my design: Front: Back: And here is how they came out with the lanyards attached: I plan to out these in my OOT bags which I will hand out at the Welcome Party Dinner! I think the guests will like them and they are practical... just toss in your beach bag and you'll always have your room key and some spare cash Happy Planning, ladies! Let me know if you have any questions. -Megan
-
From the album: My DIY Key/Tip Money Holder with pics
-

My DIY Key/Tip Money Holder with pics
Images added to a gallery album owned by MK0386 in Pictures from (pre-2014) Forum Topics
-
From the album: My DIY Key/Tip Money Holder with pics
-
From the album: My DIY Key/Tip Money Holder with pics
-
From the album: My DIY Key/Tip Money Holder with pics
-
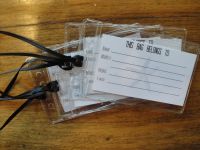
I have seen luggage tags all over this forum so thanks for all the inspiration, ladies! I made my luggage tags by creating a design and uploading it to a business card on Vistaprint. I bought cheap ID Badge Holders from Speacialst ID for only .28 cents/badge http://www.specialistid.com/Standard_ID_Badge_Holder_Vertical_Vinyl_p/1820-1050.htm I used ribbon that I bought at Micahel's on sale for 1.00 to use as the "handle" to attach to your bag. Here is my design: Back: Front: Once my "business cards" arrived, I put the luggage tags together and voila!: I plan to send these out to my guests a month or so before the wedding to get them excited and of course, for them to use on their luggage! I also plan to send a CD of fun music to get them pumped up and a letter or brochure with important travel info. Happy Planning, ladies! I'd love to see your projects. Let me know if you have any questions! -Megan
-

My DIY Luggage Tags with pics
Images added to a gallery album owned by MK0386 in Pictures from (pre-2014) Forum Topics


