-
Posts
196 -
Joined
-
Last visited
Content Type
Profiles
Forums
Gallery
Blogs
Store
Articles
Events
Reviews
Products
Everything posted by cindy2013
-
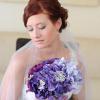
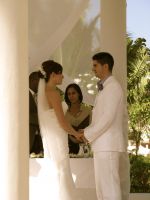
From the album: Majestic Colonial/Elegance Brides 2012-2013
-

Majestic Colonial/Elegance Brides 2012-2013
Images added to a gallery album owned by cindy2013 in Pictures from (pre-2014) Forum Topics
-
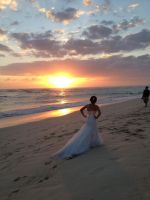
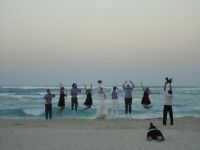
From the album: Majestic Colonial/Elegance Brides 2012-2013
-

Kukua Beach Club-Punta Cana?
cindy2013 replied to Danz's topic in Destination Weddings in Dominican Republic
I just came back from my destination wedding and it was AMAZING!!!! If any brides are lucky enough to have their wedding date available at Kukua, don't hesitate!!! It was better than I could have ever dreamed about! I am waiting for a message as to where to post my review, but for those on a time constraint, PM me!! It was breathtaking, magical...I could go on forever =) -
From the album: Kukua Beach Club-Punta Cana?
-

Kukua Beach Club-Punta Cana?
Images added to a gallery album owned by cindy2013 in Pictures from (pre-2014) Forum Topics
-

Kukua Beach Club-Punta Cana?
cindy2013 replied to Danz's topic in Destination Weddings in Dominican Republic
Hey everyone! I just wanted to bump this and see if anyone had any further information to offer about kukua! I'm seriously looking into this venue for our reception and dinner. Any info would be awesome! -
I finally finished my passport invites and wanted to share with all of you how they turned out! Thank you to the many brides on this website for inspiring me to take on the challenge. I sent them out last week and have already gotten some RSVP's! I started off searching the entire forum for DIY passports and gathered ideas from the many beautiful passports that have been done. A huge thank you to skp1, gatorgirl and joanneireland for the inspiration...I found myself going back to your invites many, many times! I started off with figuring out what information and how many pages I wanted to include. I used Aylee's free template because I wanted to insert my own monogram and backgrounds into the passport, so figured this was the easiest way to go about doing that! I played around with the design, pictures, and wording for quite a while before coming up with what I would finally include. I also changed the template a bit because when I printed up what I wanted, the pages didn't match up at all. I found my paper at paperandmore, using the recommendations of brides on this site. I found some amazing deals: 200 pages of double sided metallic champagne text paper 80# 100 metallic champagne 4 bar Euro flap envelopes 100 metallic champagne A-2 envelopes 100 silver double heart seals From Michael's, I purchased about 50 12x12 cardstock to make my passport covers and luggage tag RSVP's. These, I cut down to 8.5x11, was able to make two passport covers with, and a couple RSVP's. These are the passport covers just after folding. I printed them on my printer which is just a standard inkjet. I had gone to Staples and a few other places, but they either weren't able to print on my paper, charged a ton of money for printing, or took a few weeks to submit orders. I did some trial runs and ended up being happy with what the outcome was. Once I printed all the passport covers, I started printing the inner pages. This took a long time because I wanted to ensure each page dried properly. Then I had to print them double sided to get the effect I wanted! This is the assembly line we created. My parents were a huge help with making sure they were packaged right, and that everyone on the list was checked off. Below are my RSVP tags, which I numbered individually in case people would return them without writing their names (another helpful piece of advice from the brides on this site! These were made using the leftover cardstock, cutting it down until I was happy with the shape. I cut all of them using the original one. I then printed off my RSVP's on the metallic paper, cut them all out, and glued them to the cardstock using repositional glue bought at Michael's. They were then hole-punched and the string was looped around so that they looked fancier! After all was printed out, it was assembly time. I cut and folded for longer than I care to ever do again! After all the pages were folded, I tucked them into the cover and did this 100 times. Next step was to punch out two little rectangular holes so that I could bind the invites together with ribbon. I wasn't sure how to best tie the pages together, but after experimenting, I just went with this method. I then cut string out and tied each passport, then cut the corners of the passports to make them look more authentic! Sorry for the picture quality, I just used my iPhone! I also created a french version for my mom's side of the family, which ended up being exactly the same layout. Thanks again to all the brides for giving tons of advice!!
-
Hey guys! My quote was $1640 leaving out of Montreal for a week, on March break (March 9-16)...Not bad at all, I don't think! Any new advancements with what people have chosen? I just sent my invites out last week so when we get an idea of numbers, I will take a look at options between a private dinner or the Steakhouse. Right now though, we're booked at the Steakhouse for dinner and private reception at the wetbar! When I was there for March break this year, we went to the disco just about every night...I didn't smell puke in there at all! It was a fun time most nights!
-

Majestic Colonial wedding packages
cindy2013 replied to lmacl079's topic in Destination Weddings in Dominican Republic
Thanks for sending the info!! -
Love this! Thank you so much, now that I've crossed that magic number I can see everything! woohooo
-
Congrats and welcome!
-
Congratulations!


